King Tide Flooding in Fort Lauderdale: What Saltwater Does to Isles and Canal-Front Homes
BY RESTORATION DOCTOR OF MIAMI · MIAMI-DADE, BROWARD & PALM BEACH
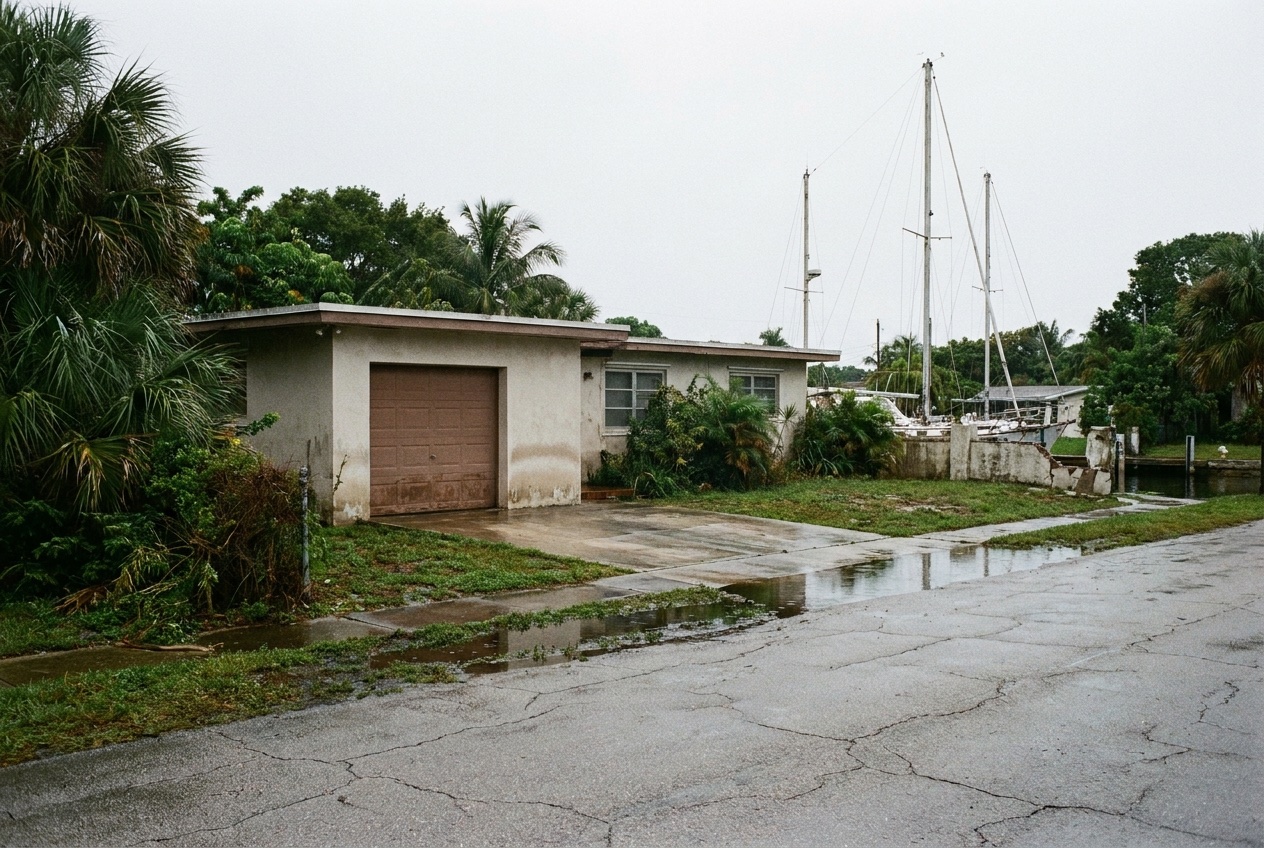
King tide flooding Fort Lauderdale homeowners see each September through November is saltwater, not rainwater — it arrives up through storm drains and over low seawalls with no storm in sight, and it leaves chlorides behind in slabs, wall bases, framing fasteners and metal hardware long after the surface looks dry. Correct handling is extraction, a controlled fresh-water rinse of salt-loaded assemblies, removal of what salt has already claimed, verified structural drying with commercial dehumidification, and corrosion inspection of electrical and mechanical components. We are hired by and paid by the homeowner; the value we add on the claim side is an IICRC-grade documentation package — photos, moisture logs, thermal imaging and a line-item estimate — that the homeowner submits to their carrier.
Call (786) 213-9489What is king tide flooding, and why does Fort Lauderdale get it worst?
King tide flooding Fort Lauderdale residents deal with every autumn is not a storm event at all. A king tide is simply the highest predicted tide of the year — what happens when a perigean spring tide lines up the sun and moon on the same axis while the moon is near its closest approach to Earth. Those alignments produce tidal ranges noticeably higher than an ordinary spring tide, and in South Florida they land hardest in the fall, roughly September through November, when seasonal factors stack on top of the astronomy: warmer, thermally expanded coastal water, a seasonally weaker offshore current, and an ocean surface that simply sits higher than it does in winter. The result is water pushed several inches to a foot or more above a normal high tide, on a cloudless Tuesday afternoon, with no rain in the forecast.
Fort Lauderdale is uniquely exposed because the city is essentially built on water. The finger isles off Las Olas, the canal streets of Rio Vista, the estate lots at Harbor Beach, the tidal reach of the Tarpon River and the New River edge of Sailboat Bend all sit on land that was dredged and filled a century ago, with living levels only a few feet above mean high water. Nearly every one of those lots is hemmed by a seawall built to whatever standard applied when it went in — often decades ago, often lower than the tide now demands. Add a stormwater system that drains by gravity to those same canals, and you have a city where the ocean can arrive through the street rather than over the beach.
How does the water actually get in when it isn't raining?
There are three routes, and most tidal losses involve at least two of them. The first is straightforward overtopping: the canal rises above the top of the seawall cap and sheets across the yard toward the house. The second, and the one that surprises owners most, is backflow through the storm drain system. Gravity outfalls are designed to move rainwater one direction — from the street to the canal — but when the canal is higher than the street, that same pipe runs backward and pushes saltwater up out of catch basins in the middle of a dry street. Owners see water welling up out of a grate and assume a broken main. It is the ocean.
The third route is subsurface. South Florida sits on porous limestone, and the water table under a coastal neighborhood rises and falls with the tide. When the tide peaks, groundwater rises with it, saturating fill under the slab and finding its way in at slab-to-wall joints, at expansion joints, around plumbing penetrations, and up through unsealed garage floors and cracked pool decks. This is why a home can take on water with a perfectly intact seawall and a dry street — the water arrived from underneath.
This is also why tidal valves and flap gates have become common retrofits on outfall lines in low-lying Fort Lauderdale neighborhoods, and why raising seawall caps is such a frequent topic at the property level. Both help with the first two pathways. Neither does much about the third. If your home floods on the tide with no visible overtopping and no water in the street, assume groundwater intrusion and have the slab perimeter and penetrations evaluated rather than only the seawall.
- Overtopping — canal rises above the seawall cap and sheets across the yard and into thresholds, garages and pool decks.
- Storm drain backflow — gravity outfalls reverse when canal level exceeds street level, pushing saltwater up out of catch basins.
- Groundwater rise — the tide lifts the water table through porous limestone, saturating slab fill and entering at joints and penetrations.
- Wind stacking — a sustained onshore breeze during a king tide window pushes the peak higher than the printed tide table predicts.
- Combined events — a routine afternoon downpour during a king tide has nowhere to drain, because the outfalls are already submerged.
What does tidal saltwater do to a slab-on-grade Fort Lauderdale home?
In South Florida there is no basement to absorb the hit — the water lands directly on the living level or one step below it. On a typical Fort Lauderdale slab-on-grade home, three or four inches of tidal water reaches the bottom of every wall assembly in the affected rooms simultaneously. Tile and terrazzo shed it, which fools people. What matters is what sits behind and beneath: the base of the drywall, the wood or MDF core of baseboard and door casing, the toe kick and bottom shelf of every cabinet run, the underside of engineered or floated wood flooring, the sill plate where a wall meets the slab, and the setting bed under the tile itself.
Drywall is the classic problem because gypsum wicks. Water that stood three inches deep for an hour will climb well above the visible line by capillary action, and when that water is saline, the salt travels with it and stays behind as the moisture evaporates. In canal-front and finger-isle homes we routinely find elevated moisture a foot or more above the waterline in a wall that looked untouched from the room.
Garages, ground-floor condo lobbies, elevator pits and mechanical rooms are the recurring wet zones on the Isles, in Harbor Beach and along the Rio Vista canal streets. Those are also the spaces with the most metal in them: water heaters and air handlers on stands, electrical panels and subpanels, garage door tracks and springs, elevator rails, pit sump pumps and pit-mounted controls. Saltwater in an elevator pit is a specific and serious problem — the pit is the lowest point in the building, it collects and holds the water, and everything in it is steel and electrical.
| Element | What tidal saltwater does | Usual outcome if handled quickly |
|---|---|---|
| Drywall & base | Wicks well above the visible line; salt deposits stay in the gypsum and paper as water evaporates | Flood-cut and replace the salt-loaded lower section; dry the cavity behind it |
| Concrete slab | Chlorides penetrate the pore structure and keep drawing humidity; can reach reinforcing steel over time | Rinse and neutralize the surface, then dry to a verified reading before covering |
| Baseboard, casing, cabinet toe kick | Wood/MDF cores swell and delaminate; salt keeps them hygroscopic afterward | Usually removal — MDF rarely recovers; solid wood is case by case |
| Floated / engineered wood floor | Water travels under the floating assembly across the whole room and sits on the slab | Lift and dry the slab beneath; the plank layer itself is often unsalvageable |
| Electrical & mechanical (panels, air handlers, water heaters) | Salt residue on terminals and windings drives corrosion and tracking long after drying | Licensed inspection; wetted components are frequently replaced, not dried |
| Elevator pit | Holds standing brackish water against rails, cables, pit controls and sump equipment | Pump out, rinse, dry, then elevator contractor inspection before returning to service |
| Pool deck & garage slab | Salt crystallizes in the concrete and under coatings; efflorescence and spalling follow | Fresh-water flush, dry, and evaluate coatings before recoating |
Why is salt the real damage, not the water?
A freshwater supply-line break and a king tide can put the exact same volume of water on the exact same floor, and they are not the same loss. Fresh water leaves when you dry it. Salt does not. When brackish canal water evaporates out of concrete, gypsum, wood and masonry, the dissolved chlorides stay behind inside the material. That leftover salt is hygroscopic — it actively pulls moisture out of the air. In a climate where outdoor relative humidity routinely sits in the 60 to 80 percent range, a salt-loaded wall base or slab never truly reaches equilibrium. It will read acceptably on a meter on a dry day and read wet again the following week, and it will keep feeding humidity to whatever is built on top of it.
That is the mechanism behind the two complaints we hear most on tidal jobs that were dried without a salt strategy: paint that keeps bubbling at the base of a wall months later, and a white crystalline bloom pushing through the slab or the garage floor. The bloom is efflorescence — salts migrating to the surface as moisture moves out. In concrete it is more than cosmetic. Chloride ions are the primary driver of reinforcing-steel corrosion, and corroding steel expands, which is what cracks and spalls concrete from the inside. On a coastal property where the concrete is already exposed to salt air, a flooding event pushes a much larger chloride load into the slab and any reinforced element it reaches.
Salt also attacks anything metal in a way plain water does not. Chloride residue on a screw head, a hurricane strap, a panel bus, a door track, or a compressor terminal creates an electrolyte film that keeps a corrosion cell running in humid air indefinitely. This is why a proper tidal restoration includes a corrosion inspection and, where appropriate, cleaning and protective treatment of exposed fasteners and hardware — not just a moisture reading.
- Chlorides are hygroscopic: salt-loaded materials re-absorb humidity and never stabilize in South Florida air.
- Efflorescence and blistering paint months later are usually a salt problem, not a new leak.
- Chloride ingress in reinforced concrete drives rebar corrosion, which cracks and spalls the slab from within.
- Salt film on metal keeps corrosion cells active in humid air long after everything reads dry.
- Brackish canal water is contaminated under the IICRC S500 standard — it is handled as a Category 3 loss, not a clean-water event.
Why is "it dried on its own" the most expensive assumption?
The water goes back out with the tide. The street clears in a few hours, the tile dries, and by the next morning the house looks the way it did. That visual recovery is the trap. Three separate things are still happening inside the structure: moisture is still bound in materials the air never touched, contamination from the canal is still present, and salt is permanently embedded in whatever the water reached.
The moisture side is straightforward building science. Air movement dries surfaces. It does not dry the inside of a wall cavity, the space under a floated floor, or the fill beneath a slab, and in this climate opening the windows makes it worse — you are pulling 75-percent-humidity air into a building you are trying to dry. Real drying requires commercial dehumidification sized to the affected volume and directed airflow into the cavities, verified with meter readings on the actual materials rather than by touch.
The contamination side is why we do not treat this like a clean spill. Canal water in an urban tidal system carries what the storm drains carry: street runoff, fuel and oil residue, lawn chemicals, animal waste, and whatever the sanitary system contributed during the same high-water period, since surcharged sewer lines and tidally influenced laterals are a genuine feature of low-lying coastal blocks. Under the IICRC S500 standard, that is Category 3 water. Porous materials it saturated are removed, remaining surfaces are cleaned and treated, and crews work in appropriate PPE.
And the mold clock is short here. On saturated gypsum and cellulose in an 80-degree South Florida home, microbial growth can begin within a couple of days. An owner who waits a week to see whether the smell goes away has usually converted a mitigation job into a remediation job.
What is the correct mitigation sequence after a tidal flood?
The order matters, because doing the right steps out of sequence wastes work. Rinsing before you extract just spreads contamination. Drying before you rinse locks the salt into the material permanently. Here is the sequence we run on a canal-front tidal loss, and it differs meaningfully from a standard clean-water dry-out at exactly two points: the salt flush and the corrosion inspection.
The first step is documentation, before anything is moved. Photographs of the standing water, the high-water line on walls and cabinetry, the intrusion path — the seawall, the drain, the threshold, the slab joint — and time-stamped images of the affected contents. Once the water is out, that evidence is gone forever, and it is the backbone of the claim file the homeowner will submit.
- Document first — photograph standing water, waterline height, intrusion path and affected contents before touching anything.
- Make it safe — de-energize wetted circuits, confirm no live electrical in standing water, and treat the water as contaminated.
- Extract — pump and vacuum out standing water, including elevator pits, sumps and low mechanical rooms.
- Demo what salt has claimed — flood-cut saturated drywall above the wick line, pull wet insulation, MDF base and casing, cabinet toe kicks and floated floor layers.
- Salt flush — controlled fresh-water rinse of exposed concrete, masonry and salvageable framing, with immediate re-extraction so the rinse water does not simply redeposit chlorides.
- Clean and treat — apply appropriate antimicrobial to remaining surfaces per the S500 contamination category.
- Dry with equipment, not weather — commercial dehumidifiers sized to the space plus directed airflow into cavities; windows stay closed.
- Monitor daily — meter the actual materials against dry-standard readings from unaffected areas of the same home, and log every reading.
- Corrosion check — inspect panels, disconnects, air handlers, water heaters, garage hardware, elevator rails and pit equipment; clean and protect, or refer to a licensed trade for replacement.
- Clearance — verify materials have reached target and stayed there before any reconstruction closes a cavity back up.
How long does drying take, and what does a tidal dry-out cost?
A contained tidal event — a garage, a laundry room, one bedroom that took a few inches — typically dries in a range of three to five days with correctly sized equipment, and a whole affected living level with cabinetry and multiple wall assemblies commonly runs longer. Salt-loaded materials sometimes need an extra monitoring cycle because they release moisture more stubbornly than clean-wet materials do, which is one more reason meters and daily logs matter more here than in a routine pipe break.
On cost, be skeptical of anyone who quotes a firm number over the phone. Pricing depends on affected square footage, how many wall and cabinet assemblies have to come apart, whether the water reached mechanical and electrical equipment, and how much salt-loaded material must be removed rather than dried. As a general range, a single-room tidal dry-out with limited demolition typically runs on the order of $2,500 to $7,500, while a whole-floor canal-front loss involving cabinetry, flooring, multiple rooms and mechanical equipment more often lands in the $12,000 to $40,000-plus range. Those are ranges, and scope moves them — the honest answer only exists after an on-site inspection and moisture mapping.
One thing worth saying plainly about how we work: the homeowner is our customer, and the homeowner is responsible for payment. We do not bill your insurance carrier. What we do provide is the documentation an adjuster expects to see — full photo logs, daily moisture readings against a dry standard, thermal imaging, equipment placement records, contamination category justification, and a line-item estimate in industry-standard format — assembled so the homeowner can submit a clean, defensible file for reimbursement. That separation keeps our obligation to you rather than to a carrier, and in our experience a well-documented file is the single biggest factor in how a tidal claim is received.
What should you document as the homeowner?
Even before a crew arrives, what you capture in the first hour has real value. Tidal claims turn on the origin of the water — whether it rose from outside, backed up through a drain, or came from a plumbing failure — because that classification determines which policy, if any, is even in play. Vague documentation invites a vague outcome.
- Wide photos and video of each affected room while water is still standing, plus close-ups of the waterline on walls and cabinets.
- The intrusion path specifically: seawall overtopping, water coming up from a street catch basin, a wet slab joint, a threshold.
- Date and time of the event, and a screenshot of the published tide prediction for that day if you can get it.
- Damaged contents with makes, models and serial numbers — appliances, electronics, mechanical equipment.
- Any exterior condition that contributed, such as a low or failing seawall cap or a standing-water street.
- Receipts for anything you buy to protect the property, plus a written log of who you called and when.
- Do not throw anything out before it is photographed and, where practical, inspected.
Is king tide flooding covered by homeowners insurance in Broward County?
This is where owners get hurt most often, and it deserves a careful, general answer rather than a promise. Standard Florida homeowners policies are generally written to exclude flood — meaning surface water, tidal water, and rising water from outside the structure. That is precisely what a king tide event is. Coverage for rising or tidal water typically comes from a separate flood policy, whether through the National Flood Insurance Program or a private flood carrier, and those policies have their own definitions, deductibles, waiting periods before they take effect, and limits on what they pay for below the lowest floor.
Some closely related scenarios can play out differently. Water that backs up through a drain or sewer line is sometimes addressed by a specific backup endorsement on a homeowners policy rather than by flood coverage. Water from a plumbing failure inside the home is a different animal entirely. And a loss during a named storm may be evaluated under wind versus water considerations that do not apply to a sunny-day tide. Which framework applies is decided from evidence about the water's origin — which is exactly why we document the intrusion path in detail on every tidal job.
We are a restoration contractor, not an insurance adviser, and we make no representation about what any particular policy will pay. Read your declarations page, know whether you carry a separate flood policy, know your flood deductible, and if you own on a finger isle or a canal street and do not carry flood coverage, treat that as a decision you have actively made rather than one that was made for you. Note also that flood policies commonly impose a waiting period, so the week a king tide is forecast is not the week to buy one.
What can you do before the next king tide season?
Fall tidal flooding is the most predictable natural hazard in South Florida — the dates are published a year ahead. That predictability is an advantage almost no other flood risk offers, and it means most of the damage we respond to was preventable at the margins.
The structural fixes are property-specific and belong to a marine contractor and an engineer: seawall cap height and condition, backflow prevention on private drain lines, sealing slab penetrations and expansion joints, regrading so water sheds toward the canal rather than the house, and waterproofing garage and pool-deck slabs. The operational fixes are yours, and they are cheap.
- Check the published tide predictions each fall and note the peak windows on your calendar.
- Have the seawall cap and any tidal valves or flap gates inspected before September by a marine contractor.
- Raise what sits on a garage or mechanical-room floor — water heaters, air handlers, panels, pumps and stored contents onto stands or shelving.
- Seal slab-to-wall joints, expansion joints and plumbing penetrations, and address cracked pool decks and garage slabs.
- Keep flood barriers or thresholds ready if your home has taken water before; the same doorway usually takes it again.
- Confirm your flood policy is in force and that you know the deductible, before the season, not during it.
- Save a 24/7 restoration number in your phone — the fastest response is the cheapest response on a salt loss.
- Photograph the dry condition of at-risk rooms now, so you have a clear before-and-after record if it happens.
When should you call for a professional tidal-water response?
Call when saltwater has entered any conditioned space, any garage or mechanical room containing electrical or HVAC equipment, any elevator pit, or any ground-floor condo lobby or common area — regardless of how quickly it drained back out. Call as well if a room that flooded weeks or months ago is showing blistering paint at the base of a wall, white crystalline residue on the slab, a musty smell that comes and goes with the weather, or hardware that has started to corrode. Those are the delayed signatures of a salt loss that was dried instead of treated, and they do not resolve on their own.
Our crews cover Fort Lauderdale's canal-front and coastal neighborhoods, including the Las Olas finger isles, Rio Vista, Harbor Beach, Colee Hammock, Tarpon River, Sailboat Bend, Victoria Park and Coral Ridge, and we respond around the clock during king tide season — call our 24/7 dispatch line. You choose your own restoration contractor as the property owner, and emergency mitigation to prevent further damage is your right to authorize without waiting for anyone's approval. The sooner the salt comes out, the less of your home has to be replaced instead of dried.